
Tutorial with explanations to learn how to play bar chords on the guitar.
On this page, you will find :
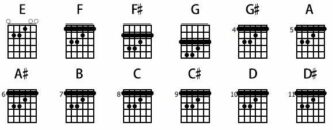
The different bar chords on guitar
Bar chords are chords that you have to make by blocking with your index finger a whole fret of the neck.
It’s a little complicated guitar technique but it allows you to do a lot of things. Among others :
- to play musical styles such as rumba or flamenco without sounding bad,
- to make certain effects of style, in particular in the gypsy jazz,
- to have access to certain chords such as F,
- or to master a hundred chords with only a few positions.
How to play bar chords for beginners
To make a barre chord, you’ll need three things : a little patience, a little work, and most importantly, a few techniques that I’ll give you here.
To master it, you will have to follow these points :
The fingers placement
As you can see, the position we use between our E chord and our F chord is roughly the same :
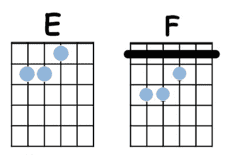
Except that there will be a small change that you have to pay attention to in order to place your fingers correctly : the index finger that we use for the E chord will be used to the F.
So we will have to reproduce the same position by changing a little the place of our fingers. Look closely at the two images below :
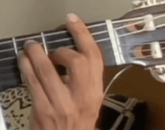
If you look closely, the index finger that was on the 1st fret of the 4th string for the E chord is replaced by the middle finger for the F chord.
Good news: this finger change only happens once !
When your F position is ready, you can shift it to the end of the neck without moving a single finger and get several chords (as you can see in the first picture).
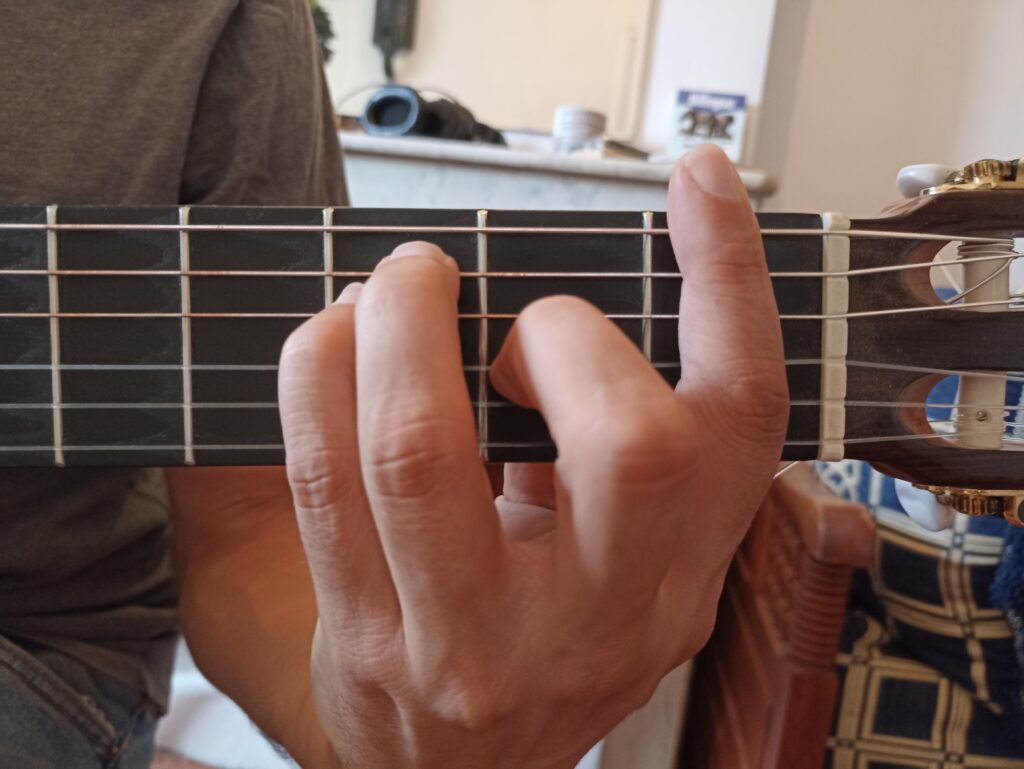
The clamp technique
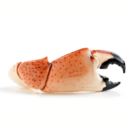
As you can see on the picture, the first thing you need to know before making your barre on guitar is that you have to create a pincer movement between the index finger and the thumb, like a crab’s claw !
You can practice in a vacuum to make this movement of distancing then bringing together between the thumb and the index. With your hand wide open, you will have to move your two fingers away from each other and then bring them together :
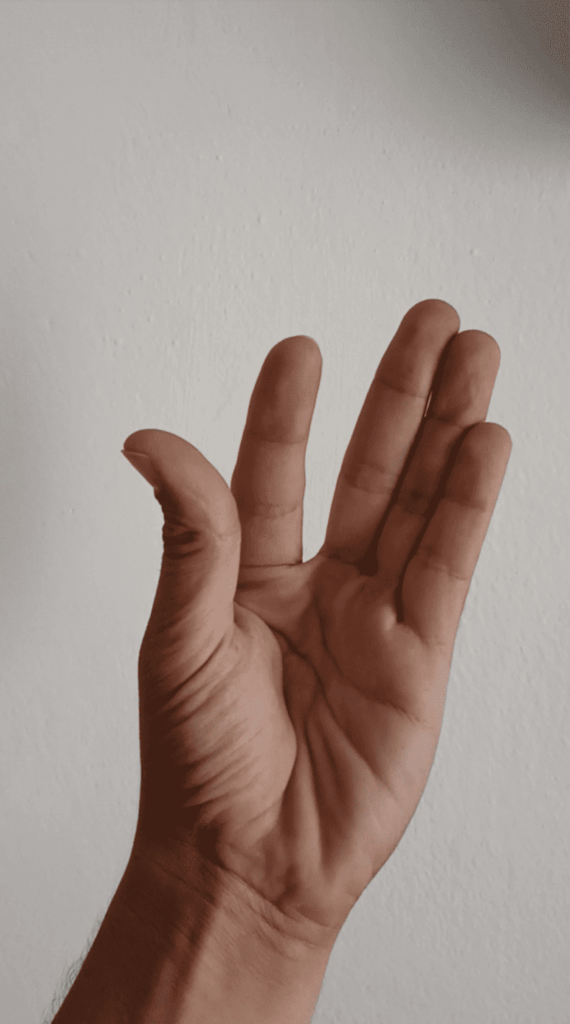
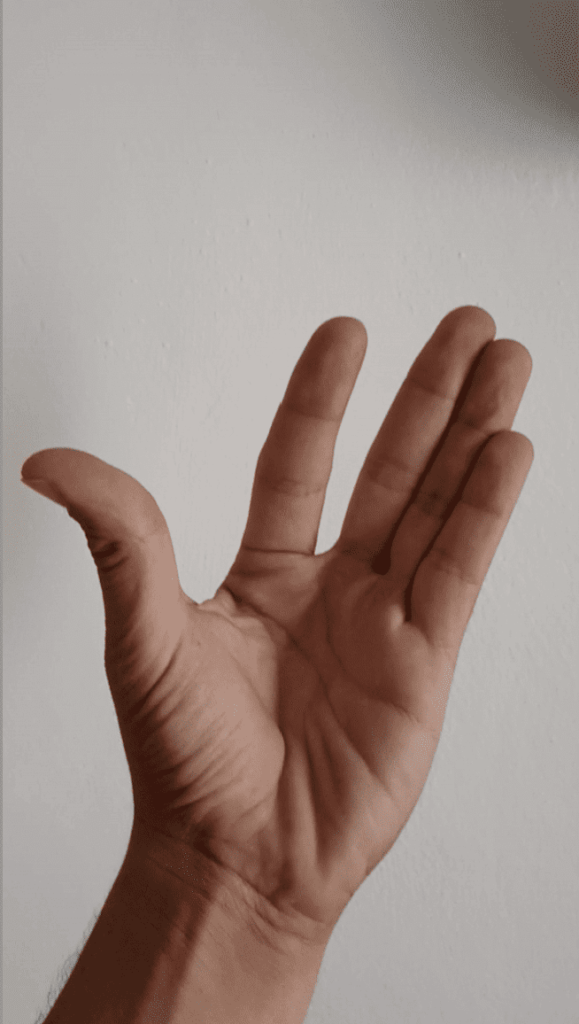
This is the move you will need to make when you start a bar chord. You can practice this before moving on.
The thumb placement technique
Once you understand these position changes and can do the pinch movement, there will surely be the problem of sound… and pain:
“it sounds bad”, “it hurts”…
Indeed, the mastery of barre chords on guitar requires a little patience. But some techniques make the work easier for you, such as thumb placement.
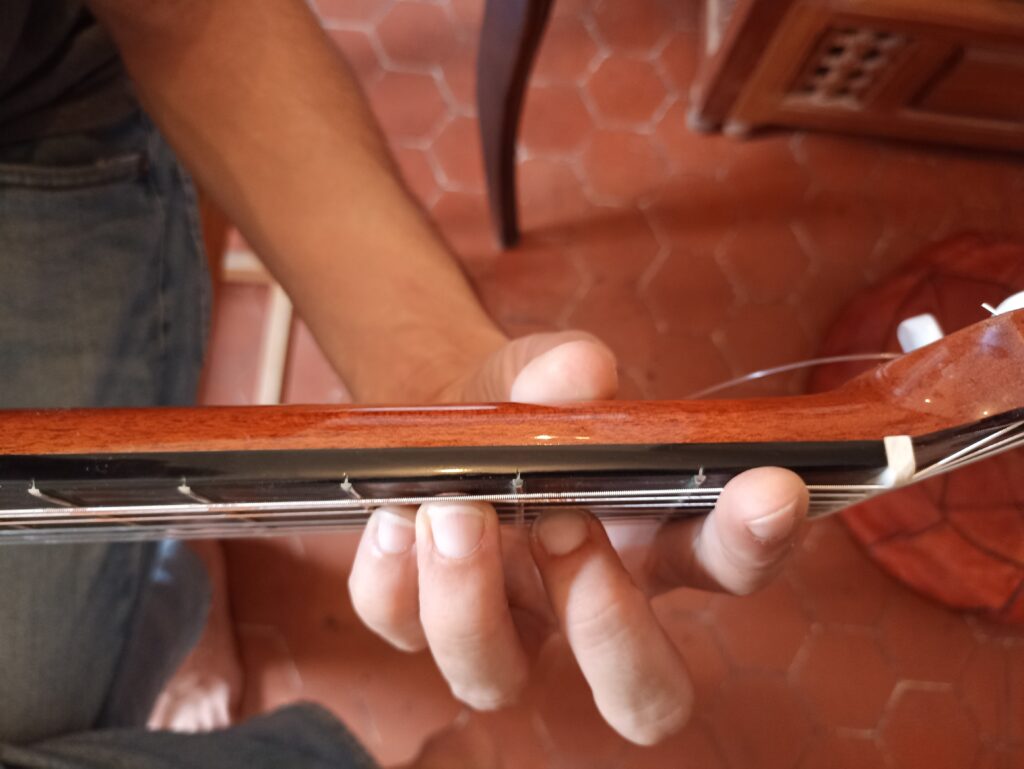

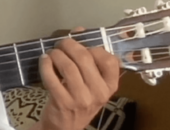
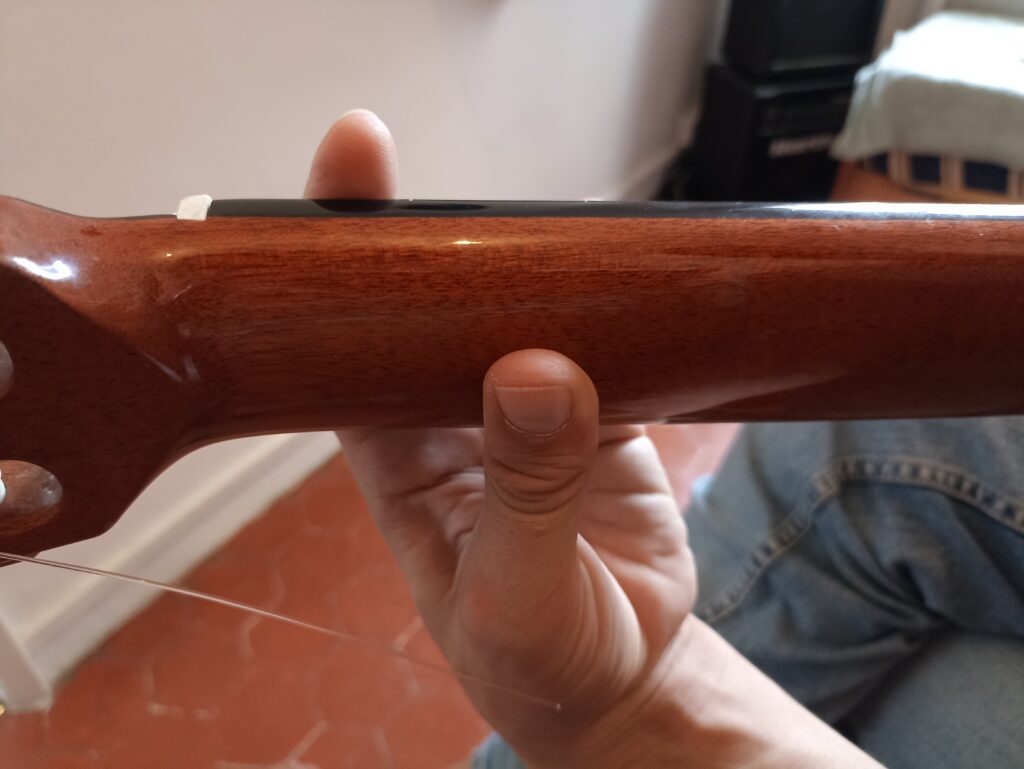
As you can see on these two pictures, the position of my fingers to make it is also important at the front of the neck and at the back of the neck.
Indeed, the placement of the thumb is crucial and will allow you to exert much more force in the index finger.
If you look closely at the pictures, you will see that the thumb is slightly off to the right of the handle. It is not facing the index finger. This is the position you’ll need to get to when you play.
You’ll see that it will sound much better. The only problem is that it may hurt a little more.
No problem, just stop for a bit, take a break, and get back to it. It hurts even the best.
When you master the technique, you can watch for our chords | tab and try to play guitar.
Work and exercise
Last but not least : if you want to succeed quickly in making the barre chords and be able to access hundreds of chords easily and with few positions, you have to practice several times a day and every day a little bit.
As we say:
“when you don’t have a head, you have legs.”
Well, if you prefer to master this technique on the guitar instead of learning and retaining a multitude of different positions, you’ll have to endure a little pain for a few days.
And to rest, you can play our easy guitar song.